1. Read Your Fluids Like a Health Report, Not an Afterthought
Fluids are your car’s bloodstream. When they’re low, dirty, or leaking, components wear faster and failures get expensive.
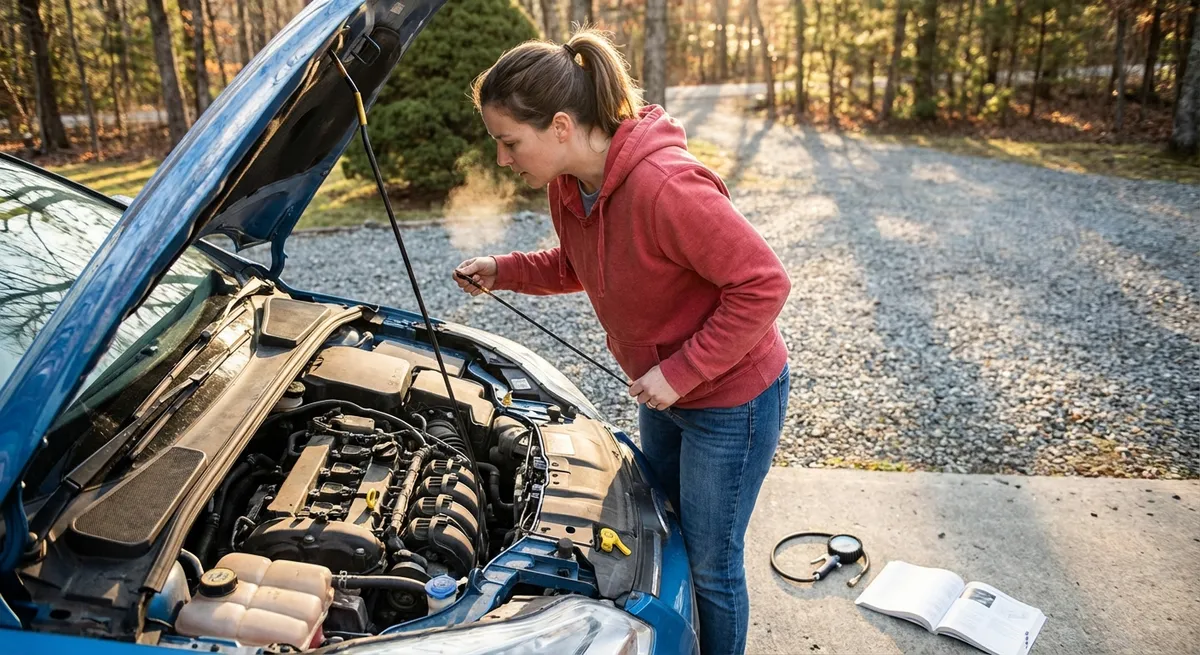
Start with engine oil. Check the level on level ground with the engine off and cooled a few minutes. The dipstick should show oil between the low and full marks. Pay attention to color and smell: fresh oil is amber or light brown; very dark, gritty, or sludgy oil can mean overdue changes or internal issues. A fuel or burnt smell can suggest fuel dilution or overheating.
Next, look at coolant in the reservoir (never open a hot pressurized radiator). The level should be between the “MIN” and “MAX” marks. If it’s constantly low, you may have a leak or a bad head gasket. The coolant should be reasonably clear and colored (often green, orange, or pink, depending on type), not rusty, milky, or full of debris.
Brake fluid is another critical check. It should be within the marked range on the reservoir and generally clear to light yellow. Dark, murky fluid can indicate moisture contamination, which reduces braking performance and corrodes components. Steering and transmission fluids (if not sealed units) can also be checked visually for level and appearance according to your owner’s manual.
Actionable habit: once a month, do a five-minute fluid walkaround—oil, coolant, brake fluid, and, if visible, power steering and windshield washer fluid. Note any significant change in color, level, or smell, and address it before it becomes a bigger issue.
2. Treat Your Tires Like Safety Equipment, Not Just Rubber
Tires are the only parts of your car that actually touch the road, and they quietly influence everything: braking distance, handling, fuel economy, and ride comfort.
Start with pressure. Use a quality gauge (not just the gas station pump reading). Compare each tire to the recommended pressure listed on the driver’s door jamb sticker, not the number on the tire sidewall (that’s max rating, not the target). Underinflation increases wear, fuel consumption, and heat buildup; overinflation reduces grip and can cause a harsher ride and uneven wear.
Inspect tread depth with a simple coin test or, better, a tread depth gauge. Most experts recommend replacing tires at around 4/32" for wet conditions and 2/32" as the absolute legal limit. Look for wear patterns: more wear in the center can mean overinflation; more on the edges often points to underinflation; uneven wear on one side can indicate alignment or suspension issues.
Don’t ignore tire age. Even with good tread, rubber hardens and cracks over time. Many manufacturers suggest inspecting or replacing tires around six years, regardless of mileage. Check the DOT code on the sidewall—the last four digits show the week and year of manufacture (e.g., “2219” means 22nd week of 2019).
Actionable habit: once a month and before long trips, check pressure on all four tires and the spare, inspect tread and sidewalls for cuts, bulges, or cords, and note any vibration or pulling at speed as a possible alignment or balance issue.
3. Listen to Your Brakes Before They Scream for Help
Brake problems almost always start with subtle symptoms: a small noise, a slight vibration, or a bit more pedal travel than you remember. If you catch them early, you’re doing pad changes instead of full caliper or rotor replacements.
When driving, pay attention to how the brake pedal feels. A firm, consistent pedal is normal. A spongy pedal, sinking pedal, or one that needs more distance to stop can signal air in the system, worn components, or fluid issues. If the brake warning light or ABS light comes on, don’t ignore it—these systems are not optional.
Listen for sounds. Occasional light squeaks in wet conditions can be normal, but regular high-pitched squealing often means the pad wear indicators are touching the rotors—your pad material is nearly gone. Grinding usually means the pad is worn through to the backing plate and is cutting into the rotor, turning a simple pad job into a more expensive repair.
You can also do a basic visual check through the wheel spokes on many cars. Look at the brake pads—there should be a noticeable thickness of friction material between the backing plate and the rotor. If you see only a thin sliver, it’s time to plan a change. Check rotor surfaces for deep grooves, heavy rust ridges, or blue discoloration from heat.
Actionable habit: once a week, during a normal drive, consciously evaluate brake feel, listen for noise during gentle and firm stops, and once a month visually inspect pad thickness and rotor condition where accessible.
4. Electrical Basics: Battery, Lights, and the “Small Stuff” That Strands You
Modern cars rely heavily on stable voltage and healthy electrical systems. Many “mysterious” dashboard warnings or intermittent issues start with a weak battery or poor connections.
Begin with the battery itself. Look for corrosion on the terminals—a white, green, or blue crust can increase resistance and reduce starting power. Check that the terminals are tight and the battery case isn’t swollen or cracked. If your car cranks slowly, especially in cold weather, or interior lights dim significantly at startup, the battery may be weakening.
Most auto parts stores can test your battery and charging system for free. This check typically includes cold cranking amps (CCA) and alternator output. Batteries often last 3–5 years depending on climate and usage; if yours is older, proactive replacement can prevent inconvenient no-start situations.
Next, walk around the car and test all exterior lights: low and high beams, turn signals, brake lights, reverse lights, and hazard flashers. Inside, confirm that key warning lights (like ABS, airbag, and check engine) come on briefly at startup, then go out. If they stay lit, that’s a diagnostic clue, not an annoyance to ignore.
Don’t dismiss a steady or flashing check engine light. A steady light often indicates a non-emergency emissions or sensor issue; a flashing light can signal active misfires that risk catalytic converter damage. Even if the car “feels fine,” scanning the codes early can prevent costlier repairs.
Actionable habit: every month, clean and visually inspect the battery area, check all lights, and if anything seems off electrically (slow crank, repeated bulb failures, strange warning lights), get a quick battery/alternator test and OBD-II scan rather than waiting.
5. Use Your Senses to Catch Leaks, Smells, and Early Mechanical Trouble
A big part of effective maintenance is simply paying attention. Your senses can catch problems long before a sensor throws a code.
After parking, periodically look at the ground under your vehicle. Fresh drips or puddles are clues. Clear water near the front passenger area is often normal A/C condensation. Oily, rainbow-sheened fluid could be engine oil, power steering, or transmission fluid. Bright green, pink, or orange liquid usually points to coolant. Dark brown or black puddles may be engine or gear oil. If you see or smell fuel, that’s urgent—address immediately.
Listen to the engine at idle, with HVAC and accessories off. A smooth, even idle is normal. New ticking, knocking, or pronounced rattling should not be dismissed as “just age.” Belt squeals on startup can signal worn belts, pulleys, or tensioners. Rhythmic thumping that changes with speed may be tire- or wheel-related.
Smell is another early warning tool. A sweet, syrupy odor often indicates coolant. A burnt smell can point to overheating brakes or slipping clutch/automatic transmission. A strong fuel smell inside or outside the cabin is a red-flag safety issue. Musty or moldy odors when the A/C is on can mean a clogged cabin filter or moisture buildup in the HVAC system.
Actionable habit: once a week, with the car idling safely in park, open the hood and simply observe for 1–2 minutes—look for leaks, listen for new sounds, and notice any unusual smells. After driving, glance at the ground where you park. Small consistent changes usually appear before major failures.
Conclusion
Keeping your vehicle reliable isn’t about memorizing a service manual—it’s about building simple, repeatable habits that catch problems early. Regular fluid checks, tire care, brake awareness, basic electrical inspections, and using your senses for leaks and odd noises form a practical maintenance routine that fits into real life. When you notice something changing—sound, feel, smell, or a new light on the dash—treat it as useful information, not an inconvenience. That mindset, more than any single “hack,” is what keeps your car ready, safe, and out of the shop for the right reasons.
Sources
- [National Highway Traffic Safety Administration – Tire Safety](https://www.nhtsa.gov/equipment/tires) - Official U.S. guidance on tire pressure, tread wear, and tire maintenance
- [Car Care Council – Free Car Care Guide](https://www.carcare.org/car-care-guide/) - Nonprofit resource with recommended maintenance intervals and inspection tips
- [U.S. Department of Energy – Maintaining Your Vehicle](https://www.energy.gov/energysaver/maintaining-your-vehicle) - Explains how proper maintenance improves efficiency and longevity
- [Bridgestone Tires – How to Check Your Tire Tread](https://www.bridgestonetire.com/learn/maintenance/how-to-check-tire-tread/) - Practical explanation of tread depth and visual inspection methods
- [AAA – Vehicle Maintenance Checklist](https://www.aaa.com/autorepair/articles/vehicle-maintenance-checklist) - Comprehensive checklist for routine owner-level inspections and service intervals